Have you seen those amazing product pictures online? It’s no coincidence that they look perfect. Behind every high-quality image is a detailed process where ideas are planned, products are styled, shots are captured, and images are polished to highlight every detail.
This blog takes you inside a professional product photography studio and explains how each stage works. Let’s explore the creative workflow that turns simple products into stunning visuals.
Step 1 – Initial Consultation and Creative Brief
Defining the Vision
Every exceptional product photo begins with a conversation. The initial consultation allows the client and studio team to align their creative goals and business objectives. During this meeting, the photographer learns about:
- The brand’s identity and tone
- The target audience and intended use of the images
- Primary benefits and unique characteristics of the product
The goal is to uncover what the product represents and how it should make viewers feel.
Prepare the Creative Brief
After the consultation, a creative brief is prepared — either by the studio or the client, depending on the agreement. This document serves as the foundation for the entire project and includes:
- The overall concept and mood of the shoot
- Preferred lighting styles, backgrounds, and color palettes
- Shot lists and framing guidelines
- Any brand-specific requirements, such as logo placement or tone consistency
This brief acts as a visual roadmap, ensuring every team member, from photographers to editors, works toward the same creative outcome.
Step 2 – Pre-Production Planning
Groundwork Setup
With the vision finalized, the studio moves into pre-production, where ideas turn into actionable plans. This stage focuses on organizing all elements needed for a productive shoot. Main tasks include:
- Props and backdrops are chosen to highlight the product’s features.
- The shoot is scheduled, and team members or models are confirmed in advance.
- Appropriate camera equipment and lenses are selected to accurately capture the product.
- Lighting setups are tested to guarantee the final images achieve the desired tone and depth.
Test and Preparation
Before the actual shoot, many studios conduct test shots or mock setups. This helps:
- Avoid last-minute technical issues
- Maintain color accuracy and brand consistency
- Identify the best angles and compositions in advance
A well-organized pre-production phase saves time during the shoot and allows creativity to flow without interruptions.
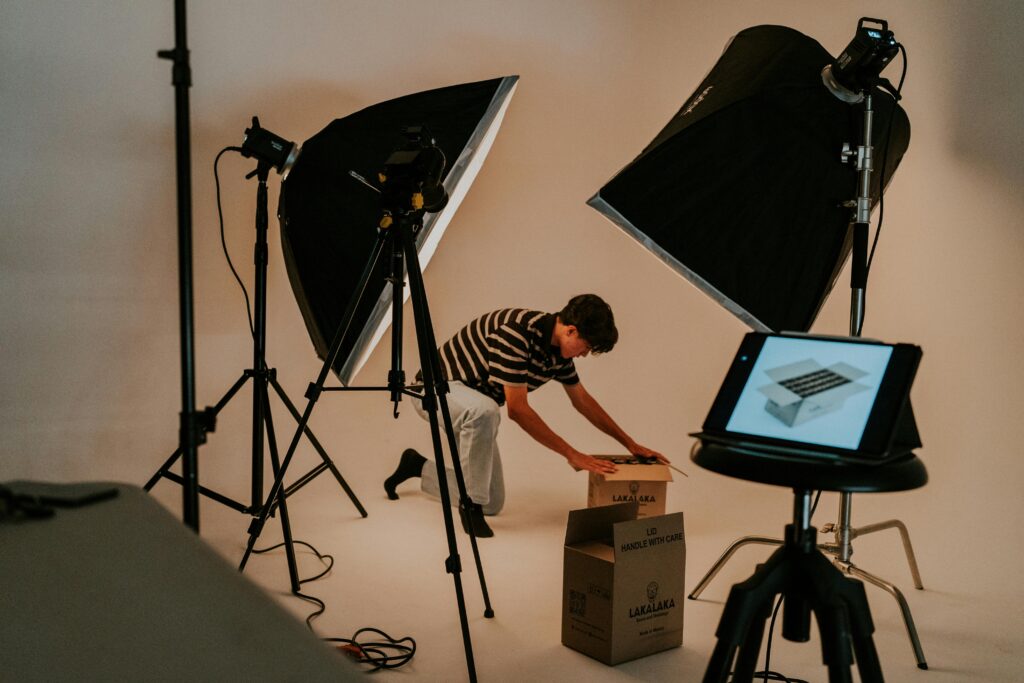
Step 3 – The Photoshoot Process
Setting the Stage
This is the moment where planning comes into creation. The studio prepares the set carefully, cleaning the product, arranging props, and adjusting lighting. Attention to detail is everything here. Even the smallest reflection, wrinkle, or fingerprint can affect the final result.
Capturing the Perfect Shot
During the shoot:
- Lighting is adjusted to highlight textures and true colors.
- Compositions are tested to find the most flattering perspectives.
- Tethered shooting is used to evaluate results in real time.
Depending on the brief, multiple versions may be shot, including hero images, lifestyle compositions, and close-up details.
Collaboration in Action
The photoshoot is highly collaborative. Photographers and stylists work in sync, adjusting props or angles between shots. Real-time previews allow clients to give instant feedback, ensuring every image aligns with brand expectations. By the end of the shoot, hundreds of high-quality images are captured, each telling a small part of the product’s story.
Step 4 – Post-Production and Editing
Selection of the Best Shots
After the shoot, the creative team reviews all images to pick the strongest ones. The selection process involves:
- Composition and framing
- Lighting balance and exposure
- How well each image represents the product’s features
Only the most impactful images move forward for editing.
Image Correction and Adjustment
This stage transforms good photos into professional-quality visuals. Editors’ focus on:
- Color correction to maintain accuracy and brand tone
- Retouching to remove dust, scratches, or imperfections
- Background clean-up or removal for a crisp, distraction-free look
- Balancing highlights and shadows to create depth and dimension
Consistency in Visuals
For large product catalogs, consistency across all images is critical. Editors apply the same tone, brightness, and alignment throughout, ensuring a cohesive visual identity across e-commerce listings, catalogs, and marketing materials.
Step 5 – Delivery and Client Feedback
Preparing Final Files
Once the edits are approved internally, the studio prepares the final deliverables. Files are exported in multiple formats to suit different uses, based on what was discussed during the brief process:
- High-resolution images for print and advertising
- Web-optimized versions for e-commerce or social media
- Transparent or white-background versions for marketplace listings
Receiving Client Feedback
The studio shares the final gallery with the client for review. Feedback is encouraged to make sure the visuals meet the brand’s expectations. Minor revisions may be made to color tones, cropping, or retouching details if necessary.
When everything is finalized, the product photography studio securely delivers the completed images through an online gallery or file-sharing platform.
Why a Professional Workflow Sets a Product Photography Studio Apart
A structured workflow separates professional studios from casual photographers. Each stage, starting with the creative brief and ending with final delivery, follows a clear process that delivers efficiency and high-quality results. Key advantages of a professional workflow include:
- Every image aligns with brand standards, maintaining visual consistency.
- Equipment and lighting are calibrated for accurate colors and sharpness.
- Teams combine photography expertise with visual storytelling skills.
- Projects are completed on schedule, with revisions handled professionally.
- Images consistently strengthen brand identity and support marketing goals.
- Images attract viewers and highlight the product’s value.
Final Thoughts
A professional product photography studio handles every step carefully, including planning and editing, to make products look their best. Now, you might be wondering where to find the right studio. Well, visit Elena Vels Studio! We provide high-quality photography for e-commerce and commercial brands, showcasing products to attract attention and present them at their best online. For clean, polished visuals that reflect your brand, contact us .