As a professional makeup product photographer, it is essential to portray every detail of the product through the pictures, whether it be color, texture, or other minor details. To achieve high-quality images, proper lighting and background play an essential role. However, there are also considerations when using lighting and background; otherwise, you may end up with blurry images and busy backgrounds. This blog post will guide you through essential techniques and tips to help you master the use of lighting and background in makeup product photography. So, without any delay, let’s get started:
Importance of Lighting in Makeup Product Photography
Lighting plays a crucial role in beauty and skincare product photography, capturing the true essence of each product. Its significance lies in highlighting texture, color, and details. Consistent lighting across all pictures builds customer trust, ensuring they know what they see is what they’ll get. Additionally, it allows for precise control over shadows.
Lighting Setup For Makeup Product Photography:
Creating a lighting setup for makeup product photography involves strategic placement and adjustment of light sources. Here’s a basic setup to consider:
1. Use Soft, Diffused Lighting
Matte surfaces are typically photographed with harsh light to bring out their texture and fine details. The direct, intense light emphasizes the surface characteristics, making the product appear more defined. On the other hand, reflective surfaces require soft light to minimize harsh reflections and glare. Using a softbox or diffuser creates a gentle, even light that highlights the product’s form and sheen without creating distracting bright spots. This approach ensures that reflective products are displayed attractively and clearly.
2. Employ Multiple Light Sources
Using multiple light sources ensures that your product gets even lighting through all sides. This will help you get a better shot of all aspects without creating unwanted shadows or overexposure.
-
Key Light: The primary light source, placed at a 45-degree angle to the product.
-
Fill Light: Positioned opposite the key light to fill in shadows.
-
Back Light (or Rim Light): This is placed behind the product to create separation from the background and add depth.
3. Utilize Reflectors and Bounce Cards
Reflectors and bounce cards let you control and direct light, filling in shadows and balancing the illumination without additional light sources.
-
Tip: Place white or silver reflectors opposite the light sources to bounce light back onto the product. Use smaller bounce cards for precise control.
4. Control Light Temperature and Color Balance
Consistent light temperature is essential to capture the true nature of colors in the photograph.
-
Tip: Use daylight-balanced lights (around 5500K) to maintain color consistency. Adjust the white balance settings on your camera to match the light source.
5. Avoid Mixed Lighting
Mixing different light sources (e.g., natural and artificial light) can create color casts and make color correction difficult.
-
Tip: Stick to one type of light source. If using artificial lighting, block out natural light to prevent interference.
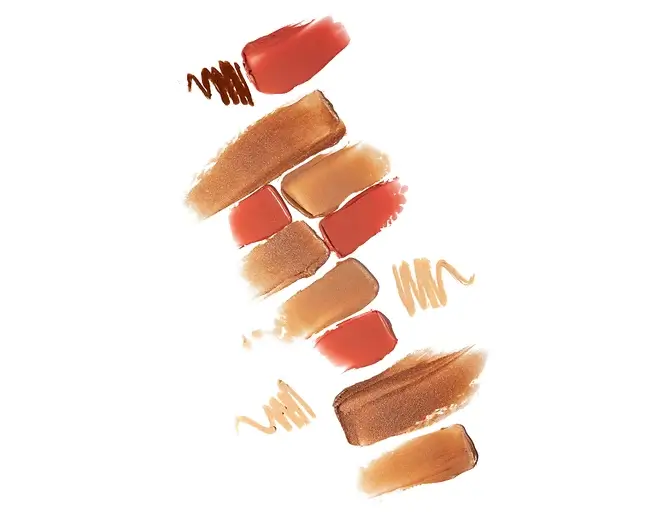
6. Highlight Textures and Details
Makeup products often have intricate textures and details that need to be showcased accurately to appeal to consumers.
-
Tip: Use angled lighting to emphasize textures. Side lighting can bring out the details without causing glare.
Importance of Background in Makeup Product Photography:
The use of the right background is important for color accuracy, depth of field, and compositional balance. You must understand the choice of background materials, lighting dynamics, and color theory interaction. All of this will improve the representation of the product’s color and textures, which are critical for cosmetic photography.
Background Setup for Makeup Product Photography:
While lighting sets the stage, the background serves as a canvas on which your product adds all the color and texture. Here are some set-up tips for utilizing background in makeup product photography:
1. Choose a Neutral Background:
Use a neutral background so that the focus remains on the makeup product without any distractions.
Tip: Use solid colors like white, gray, or black. These colors provide a clean and professional look and help in post-processing.
2. Utilize Gradient Backgrounds:
Gradient backgrounds add depth and dimension to the image, making it visually interesting without distracting from the product.
Tip: Perform a Gradual transition from one shade to another, just make sure that the gradient complements the makeup product.
3. Incorporate Textured Backgrounds:
Subtle textures can add interest and a sense of luxury without overwhelming the product.
Tip: Use materials like marble, wood, or fabric with minimal texture. Ensure the texture is not too busy or reflective.
4. Experiment with Reflective Surfaces:
Reflective surfaces can create interesting visual effects, highlighting the product’s features and packaging.
Tip: Use surfaces like glossy acrylic, glass, or mirrored tiles. Be mindful of reflections and ensure they do not distort the product’s appearance.
5. Use Complementary Props:
Props add to the storytelling aspect of the photograph, giving context and highlighting the product’s features.
Tip: Use props sparingly and use the ones that are relevant to the makeup product. For instance, use makeup brushes, flowers, or themed accessories that complement the product.
6. Experiment with Background Distance
Adjusting the distance between the product and the background can change the lighting and depth effects, enhancing the final image.
-
Tip: Place the product closer or further from the background to see how it affects the shadows and focus. This can help in achieving the desired look and feel.
Conclusion
Mastering lighting and background in makeup and beauty product photography are all about using proper light sources, whether that is the key light, fill light, or backlight with a background that does not overpower your product. By using high-quality images for your product marketing, you can highlight its true texture and color will drive customer engagement and boost sales, making your makeup product photos a crucial element in driving sales.